Unleashing the Power of Visual Thinking: Creating Mind Maps in Microsoft Word
Related Articles: Unleashing the Power of Visual Thinking: Creating Mind Maps in Microsoft Word
Introduction
With great pleasure, we will explore the intriguing topic related to Unleashing the Power of Visual Thinking: Creating Mind Maps in Microsoft Word. Let’s weave interesting information and offer fresh perspectives to the readers.
Table of Content
- 1 Related Articles: Unleashing the Power of Visual Thinking: Creating Mind Maps in Microsoft Word
- 2 Introduction
- 3 Unleashing the Power of Visual Thinking: Creating Mind Maps in Microsoft Word
- 3.1 Understanding the Essence of Mind Maps
- 3.2 Benefits of Utilizing Mind Maps in Word
- 3.3 A Step-by-Step Guide to Creating Mind Maps in Word
- 3.4 Frequently Asked Questions (FAQs)
- 3.5 Tips for Creating Effective Mind Maps in Word
- 3.6 Conclusion
- 4 Closure
Unleashing the Power of Visual Thinking: Creating Mind Maps in Microsoft Word
In the realm of information organization and creative problem-solving, mind maps have emerged as a powerful tool. This visual representation technique, characterized by its hierarchical and interconnected nature, offers a unique approach to brainstorming, note-taking, and project planning. While specialized mind mapping software exists, the ubiquitous Microsoft Word provides a surprisingly effective platform for creating these intricate diagrams. This article explores the process of crafting mind maps in Word, highlighting the advantages this method offers and providing a comprehensive guide to its implementation.
Understanding the Essence of Mind Maps
Mind maps, often referred to as concept maps or spider diagrams, depart from linear note-taking methods by mirroring the way the human brain processes information. They utilize a central topic as the core, branching out into related ideas, concepts, and details. This radial structure, with its emphasis on visual connections and associations, fosters intuitive understanding, encourages creativity, and enhances memory retention.
Benefits of Utilizing Mind Maps in Word
While dedicated mind mapping software offers specialized features and interfaces, utilizing Word for this task presents a distinct set of advantages:
- Accessibility and Familiarity: Word’s widespread availability and user-friendly interface make it a readily accessible tool for creating mind maps. Users are already familiar with its basic functionalities, reducing the learning curve and facilitating seamless integration into existing workflows.
- Versatility and Integration: Word’s versatility allows for seamless integration of text, images, and multimedia elements within the mind map. This flexibility enables the inclusion of visual aids, diagrams, and even audio or video clips, enriching the visual representation and enhancing understanding.
- Collaboration and Sharing: Word’s collaborative features facilitate seamless team work on mind maps. Multiple users can work on the same document simultaneously, fostering a shared understanding and collective brainstorming experience. Additionally, the ability to share documents in various formats ensures easy dissemination and accessibility.
- Customizability and Flexibility: Word’s extensive formatting options provide a high degree of customization for mind maps. Users can adjust font styles, colors, shapes, and layout elements to create visually appealing and informative diagrams tailored to specific needs and preferences.
A Step-by-Step Guide to Creating Mind Maps in Word
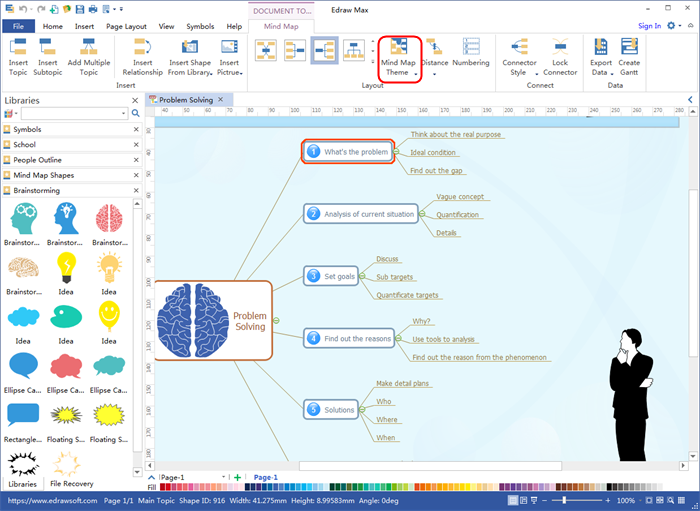
1. Choosing the Right Template:
Word offers a variety of pre-designed templates that can serve as starting points for mind maps. These templates provide basic layouts and formatting, streamlining the initial setup process. Users can select a template that aligns with their specific needs and preferences, whether it’s a simple radial structure or a more elaborate diagram.
2. Defining the Central Topic:
The foundation of any mind map lies in the central topic, the core idea around which all other branches and sub-branches will radiate. Clearly defining the central topic is crucial, ensuring that all subsequent elements relate to it and contribute to a cohesive representation.
3. Branching Out: Creating Main Ideas:
The central topic serves as the root of the mind map, and from it, main ideas or branches emerge. These branches represent the primary concepts, themes, or aspects related to the central topic. Each branch should be concise and clearly convey its relationship to the central idea.
4. Sub-Branching: Expanding on Ideas:
Expanding upon main ideas, sub-branches delve deeper into specific details, sub-themes, or supporting concepts. These sub-branches provide a more nuanced understanding of the main ideas and their connections to the central topic.
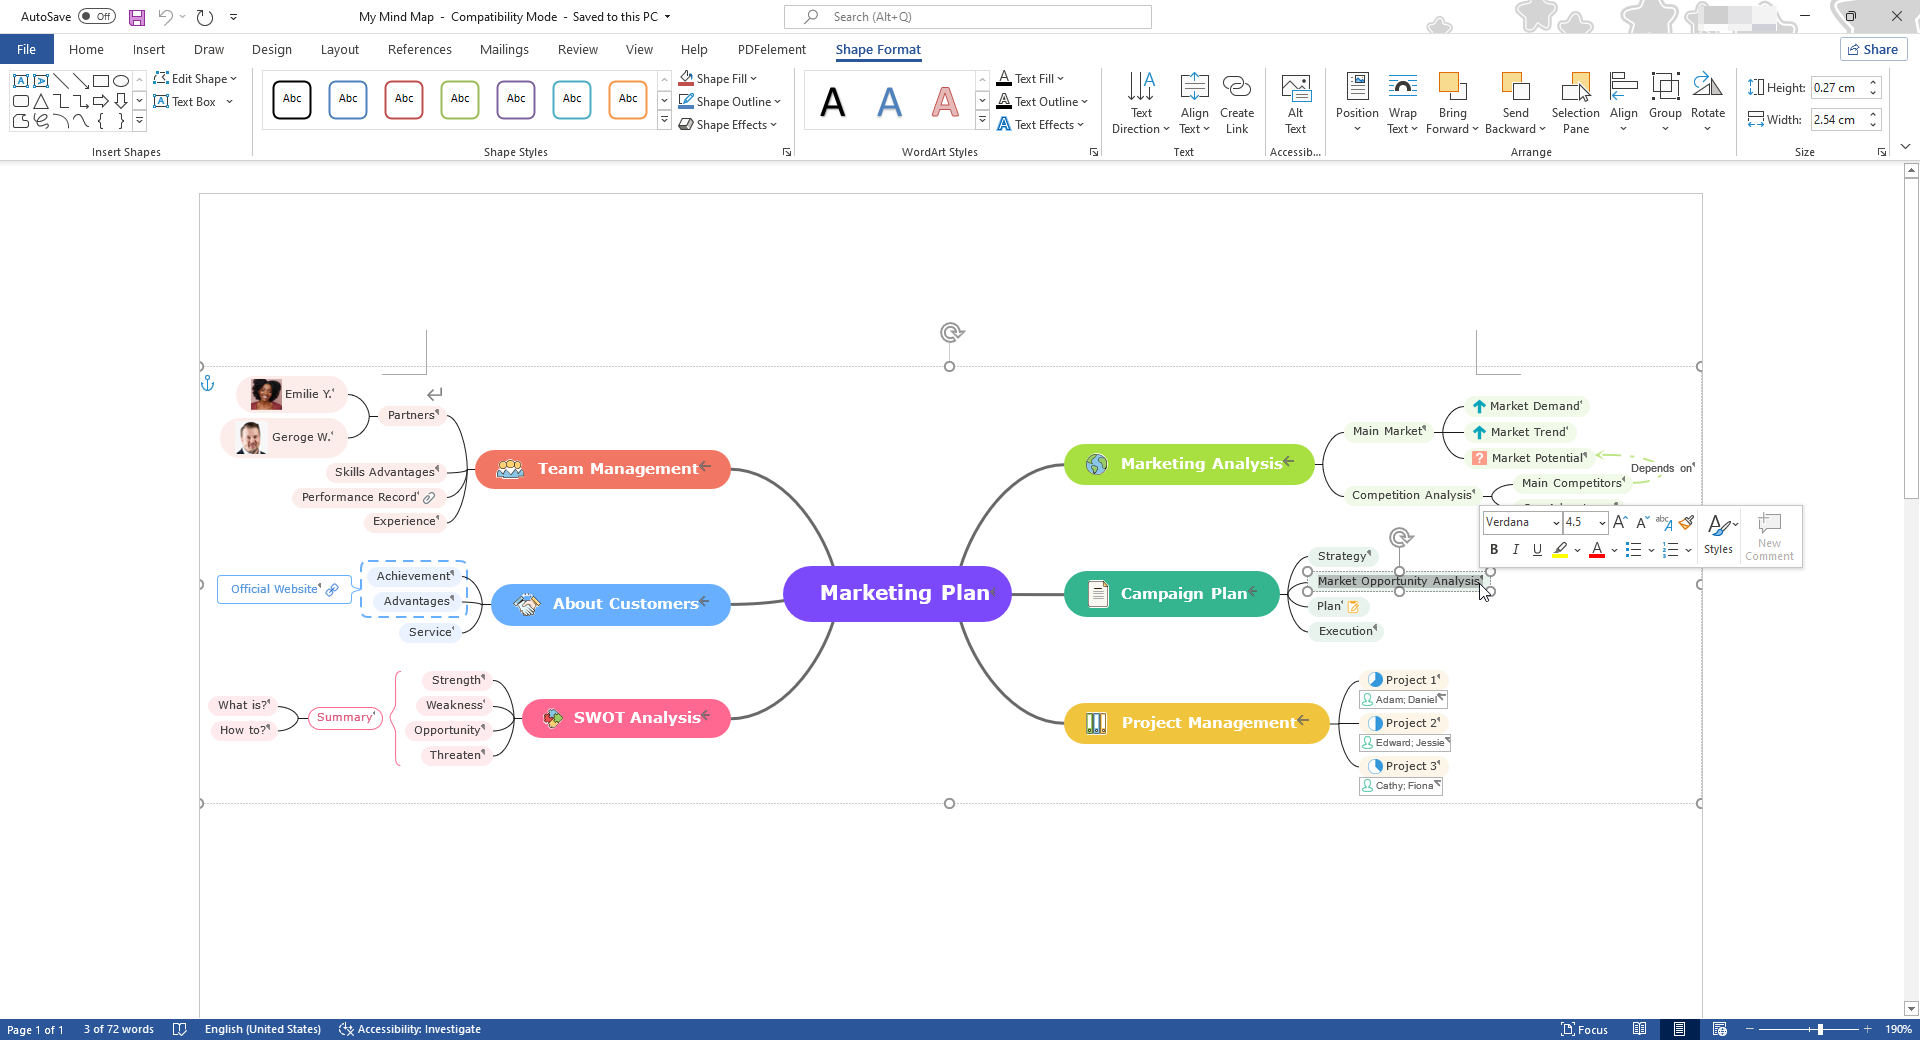
5. Utilizing Visual Elements:
Visual elements play a crucial role in enhancing the clarity and memorability of mind maps. Utilizing shapes, colors, icons, and images helps to visually differentiate branches, highlight key points, and create a more engaging and memorable representation.
6. Adding Text and Notes:
Within each branch and sub-branch, text and notes provide further explanation, elaboration, or supporting information. Concise and clear wording ensures that the information is easily absorbed and readily accessible.
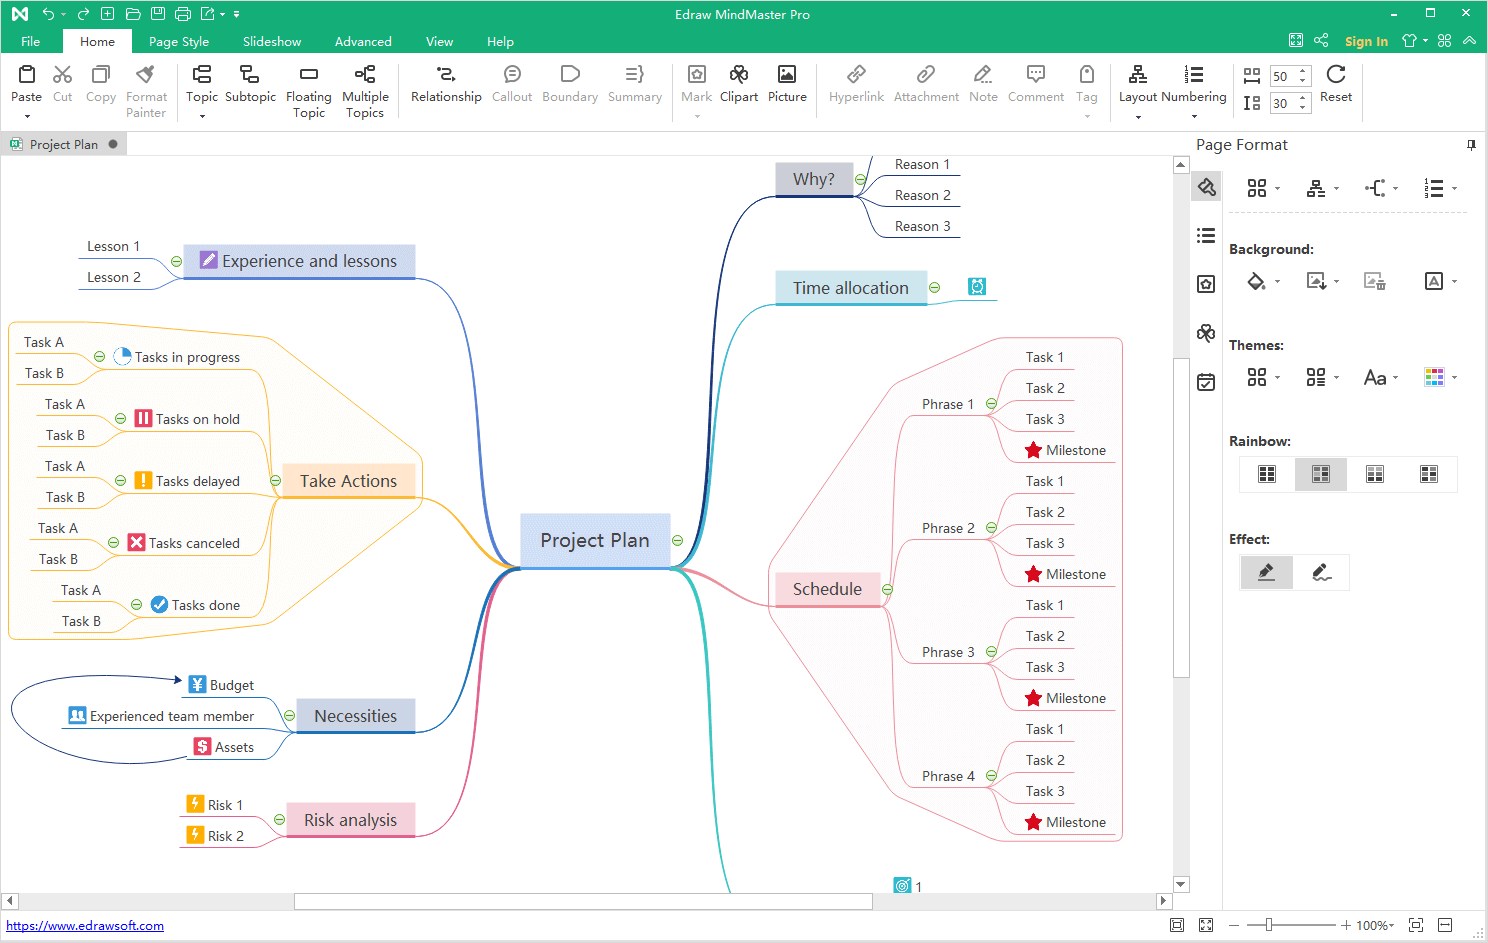
7. Connecting the Dots: Establishing Relationships:
Mind maps are more than just a collection of branches and sub-branches. They are interconnected networks of ideas, and highlighting these connections is crucial. Utilizing lines, arrows, or other visual cues to connect related branches and sub-branches strengthens the understanding of relationships and dependencies.
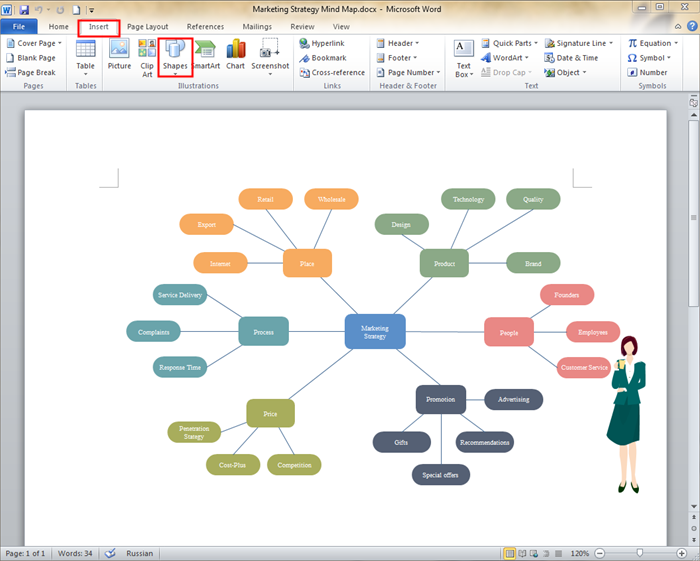
8. Leveraging Word’s Features:
Word’s built-in features offer a range of tools for creating effective mind maps:
- SmartArt: Word’s SmartArt feature provides a selection of pre-designed diagrams, including hierarchical structures suitable for mind maps. These diagrams offer a quick and convenient starting point for creating visually appealing and organized representations.
- Shapes and Connectors: Word’s shape tools allow for the creation of custom branches and sub-branches. These shapes can be customized with colors, sizes, and styles to enhance visual appeal and differentiation. Connectors provide a visual representation of relationships between branches and sub-branches, enhancing the understanding of connections and dependencies.
- Text Boxes and Notes: Word’s text boxes provide a dedicated space for adding notes, explanations, or additional details within the mind map. These text boxes can be linked to specific branches or sub-branches, ensuring that relevant information is easily accessible.
- Formatting Options: Word offers a wide range of formatting options for customizing the appearance of mind maps. Users can adjust font styles, colors, sizes, and spacing to create visually appealing and informative representations that align with their specific needs and preferences.
Frequently Asked Questions (FAQs)
Q: Can I use Word’s built-in drawing tools to create a mind map?
A: While Word’s drawing tools can be used to create basic mind maps, they may not offer the same level of functionality and ease of use as dedicated mind mapping software or SmartArt.
Q: How can I make my mind map visually appealing?
A: Utilizing colors, shapes, icons, and images can significantly enhance the visual appeal and memorability of mind maps. Experiment with different combinations and styles to find what works best for you.
Q: What are some tips for creating effective mind maps?
A: Keep the central topic clear and concise. Use concise and descriptive language for branches and sub-branches. Highlight key points with bold text or different colors. Utilize visual elements to differentiate branches and sub-branches. Ensure that all elements are interconnected and logically related.
Q: How can I share my mind map with others?
A: Word offers various options for sharing mind maps, including exporting as a PDF, saving as a Word document, or sharing through cloud storage services.
Tips for Creating Effective Mind Maps in Word
- Start with the central topic and radiate outwards. This approach ensures that all elements are connected to the core idea and contribute to a cohesive representation.
- Use concise and descriptive language. Avoid jargon or overly complex phrasing, ensuring that the information is easily understood.
- Utilize visual elements to enhance clarity and memorability. Colors, shapes, icons, and images can help to visually differentiate branches and sub-branches, highlight key points, and create a more engaging representation.
- Connect related branches and sub-branches. This establishes the relationships and dependencies between ideas, fostering a deeper understanding of the interconnected network.
- Review and refine your mind map. Once completed, take the time to review your mind map, ensuring that it is accurate, concise, and visually appealing. Make any necessary adjustments to enhance its clarity and effectiveness.
Conclusion
Creating mind maps in Word offers a convenient and accessible way to harness the power of visual thinking. Word’s user-friendly interface, versatility, and integration with other Microsoft Office applications make it a suitable platform for brainstorming, note-taking, and project planning. By following the steps outlined in this article, users can effectively create visually engaging and informative mind maps that facilitate understanding, encourage creativity, and enhance memory retention. The accessibility of this technique empowers individuals and teams to unlock the potential of visual thinking, transforming complex ideas into clear and organized representations.


Closure
Thus, we hope this article has provided valuable insights into Unleashing the Power of Visual Thinking: Creating Mind Maps in Microsoft Word. We hope you find this article informative and beneficial. See you in our next article!